How to Organize a Small Pantry Without Wasting Space

Updated: Aug 10

A small pantry rarely needs more containers. It usually needs fewer hidden layers.
How we research recommendations: The products discussed here have not been personally tested by Amour Living unless clearly stated. We compared current product specifications, dimensions, materials, customer ratings and recurring feedback. Availability, ratings and product details can change, so recheck the listing and measure your cabinet before ordering.
Affiliate disclosure: This article may contain affiliate links. If you make a qualifying purchase through one of these links, Amour Living may earn a commission at no additional cost to you.
The quickest way to make it work is to remove expired and unwanted food, group what remains by how you use it, and give the easiest-to-reach space to everyday items. Then use a tray, bin, turntable or tiered shelf only where it solves a specific problem.
That order matters. If you buy organizers first, you can end up storing the same clutter in prettier boxes—and losing even more usable space to thick sides, lids and gaps.
This guide shows you how to organize a small pantry so food stays visible, older items get used and the system is realistic to maintain.
Short on time? Jump straight to the small-pantry plan ↓

Why small pantries waste space
The problem is not always the pantry's size. It is often the way the space is being used.
Common causes include:
· tall shelves holding short cans with empty air above them;
· two or three rows of packets hiding one another;
· wide categories such as “snacks” spreading across several shelves;
· bulk purchases that do not fit the household's normal routine;
· round baskets or oversized containers leaving awkward gaps;
· decanted food with no date or cooking instructions attached; and
· heavy or rarely used items occupying the most convenient shelf.
A beautiful pantry can still be inefficient. The better goal is not perfect rows. It is being able to answer three questions quickly:
1. What do we have?
2. What should we use next?
3. Where does this go when it comes back from the shops?
If the layout answers those questions, it is doing its job.
Measure before you buy anything
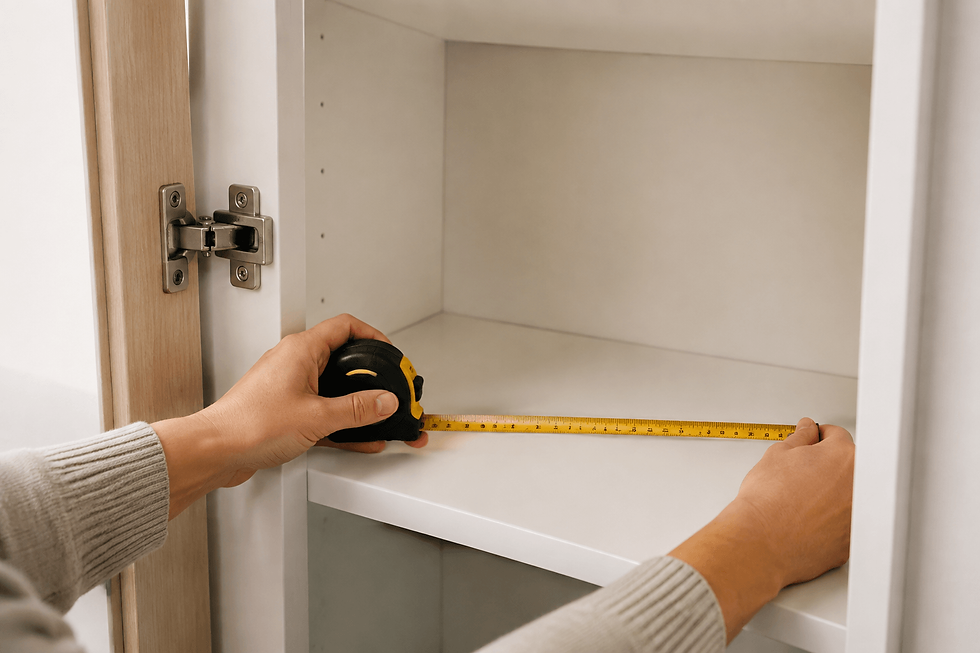
Measure the clear internal width, depth and height of each shelf—not just the outside of the cupboard.
Also note:
· hinges, door frames and shelf supports that narrow the opening;
· whether shelves can be moved;
· the height of the tallest item in each proposed zone;
· how far you can comfortably reach;
· whether an organizer must clear a door lip; and
· whether the shelf is solid or wire.
Measure at more than one point if the pantry is old or irregular. A bin that fits the shelf but cannot pass through the door opening is not a useful bin.
Use painter's tape or cardboard to mark an organizer's footprint before buying it. This simple test reveals whether it would improve access or merely consume space.
The small-pantry plan
1. Empty one section at a time
If the pantry is overwhelming, do not empty the entire cupboard onto the kitchen floor. Work shelf by shelf.
As each item comes out:
· discard anything leaking, contaminated or affected by pests;
· check the date and the manufacturer's storage directions;
· put unopened duplicates together;
· set aside food your household will not realistically use; and
· wipe and dry the shelf before anything returns.
In the United States, most package dates describe quality rather than safety. The USDA explains that a “Use-By” date is generally the manufacturer's recommendation for peak quality and is not a federal safety date, except when used on infant formula. Follow the package's storage directions, check food for signs of spoilage and use the USDA's food product dating guidance if you are unsure what a label means.
Do not pour new food on top of old food in a container. Finish and clean the container first, or keep the batches separate so the older product does not disappear underneath.
2. Create zones based on your routine
Broad labels sound organized but often become dumping grounds. Use categories that match how your household cooks and shops.
Useful zones might include:
· breakfast;
· lunch-box food;
· weeknight meal bases;
· pasta, rice and grains;
· tins and jars;
· baking;
· tea and coffee;
· snacks; and
· back stock.
Keep the zones few enough that everyone understands them. “Weeknight meals” may work better than five tiny ingredient categories if those foods are normally used together.
Place everyday items between roughly waist and eye height. Store lighter, less-used items higher. Keep heavy bottles and bulk goods lower so they are easier and safer to lift.
3. Give the front row a job
In a small pantry, the front should not become a wall that hides the back.
Use the front for:
· the packet already open;
· the item with the earliest suitable date;
· ingredients needed for this week's meals; or
· a narrow grab-and-go category.
Keep unopened duplicates behind or below the item currently in use. This creates a simple “use first” system without turning the pantry into a shop display.
4. Match the organizer to the access problem

Different shapes solve different problems:
For packets that collapse or spread: Try one narrow open bin. Skip it if the bin is too deep to see into or too heavy to lift comfortably.
For bottles hidden in a corner: A low-rim turntable can improve access. Skip it when the shelf is too shallow or most packages are rectangular and already fit neatly in rows.
For can labels hidden behind one another: A tiered shelf can reveal the back row. Skip it on wire shelving or when the raised cans will not clear the shelf above.
For short items wasting shelf height: A shelf riser may help, but only when both levels remain visible and reachable.
For deep shelves hiding back stock: A handled pull-out bin can keep one category together. Skip it if the loaded bin would be too heavy to pull safely.
For small sachets that get lost: Use a shallow tray or small box rather than a large mixed bin.
The best organizer makes food easier to retrieve without requiring another organizer to control it.
Three useful organizer types—and when to skip them
Best targeted solution for hidden cans: YouCopia ShelfSteps Can Organizer

Best for: A solid pantry shelf where cans are stored in two or more rows and the back labels are hard to see.
Why it stands out: The three movable shelves can be used separately or nested into a four-level display. YouCopia states that the depth adjusts from approximately 12.2 to 32 cm (4.8 to 12.6 in). The assembled footprint is about 34 cm wide × 16.5 cm high (13.4 × 6.5 in), with approximately 5.7 cm (2.25 in) between levels. The manufacturer says it holds 16–24 cans, depending on the setup, and up to 13.6 kg (30 lb).
The strongest benefit is visibility. It lets you scan labels without unloading the front row.
Drawbacks and limitations: YouCopia specifically says it is not recommended for wire shelves. It also needs enough vertical clearance for the raised cans, and the fixed width may consume too much space in a very narrow pantry. It is hand-wash only, not dishwasher safe.
Who should avoid it: Households that store few cans, have wire shelving, have less than about 16.5 cm (6.5 in) of free organizer height before adding the cans, or would gain more from one simple row.
Buying check: Measure the shelf, doorway and height above the tallest can. Confirm the current seller, delivery, rating, dimensions and recent low-star reviews before ordering.
Check current availability and buyer feedback for the YouCopia ShelfSteps Can Organizer on Amazon US.
You can also confirm the latest measurements and care instructions on the official YouCopia ShelfSteps product page.
Best for bottles in an awkward corner: a low-rim turntable

A turntable can make oils, vinegars, sauces and jars easier to reach when they would otherwise form a hidden back row.
The OXO Good Grips 28 cm (11 in) Turntable is a reasonable example because it has non-slip feet, a deep ledge and a wide base designed to turn without catching nearby items or walls. Its round shape is useful in a corner, but it does not magically create more shelf area.
Drawbacks and limitations: A 28 cm circle leaves unused corners on a rectangular shelf. Tall bottles can become unstable if they are packed too tightly or if the turntable is spun carelessly. It is also a poor choice for flour bags, pasta boxes and other rectangular packages.
Who should avoid it: Anyone with a shelf shallower than the product's full diameter and clearance, or a pantry already laid out efficiently in straight rows.
Buying check: Test a 28 cm (11 in) paper circle on the shelf. The official dimensions are approximately 28 × 28 × 3.8 cm (11 × 11 × 1.5 in). Make sure the door closes and the tallest bottle clears the shelf above while rotating.
Check current availability and buyer feedback for the OXO Good Grips 11-Inch Turntable on Amazon US.
Confirm the current dimensions, design and warranty information on the official OXO 11-Inch Turntable product page.
Best budget solution for packets: use a container you already own

For pasta packets, snack bars, sachets or baking packets, a spare shoebox-sized tub or sturdy open container may work as well as a purpose-made pantry bin.
Test it for a week. If the category stays contained and the box slides out comfortably, you have solved the problem without spending anything.
Only buy a clear handled bin if visibility and pull-out access are still poor. Choose the exact number and dimensions required rather than a large matching set. Deep bins can become heavy, and tapered or thick-sided bins may hold less than their external dimensions suggest.
If you do decant dry goods, keep the product name, allergen information, storage directions, preparation instructions and date details. A pantry should become easier to use, not less safe or less informative.
How to use deep pantry shelves without losing food

Deep shelves work best when the front and back have different roles.
Try one of these arrangements:
· Current item in front, duplicate behind: good for cereal, pasta and regularly replaced staples.
· Everyday category in a pull-out bin: good for packets that otherwise fall over.
· Turntable in one back corner: good for jars and bottles, provided the full circle rotates freely.
· Tiered cans at the back with one clear viewing line: good when the shelf height allows every label to remain visible.
Avoid placing two deep bins one behind the other. The rear bin will usually become long-term storage by accident.
If food packets are taking over your drawers, decide what belongs on a shelf and what belongs in a drawer with our guide to organizing deep kitchen drawers without wasting space.
How to organize a small pantry on a budget
You do not need a complete matching-container makeover.
Start with these no-cost changes:
1. Remove food your household will not use.
2. Move everyday items to the easiest shelf.
3. Put duplicates directly behind the open item.
4. Use existing trays and boxes to test categories.
5. Adjust movable shelves to suit the actual food heights.
6. Create a “use first” area for suitable items approaching their best-before date.
After one or two weeks, notice what still fails. Buy for that failure only.
For example, if bottles still disappear in a corner, consider one turntable. If cans still hide, consider one tiered shelf. If the system is working, stop. Empty space is useful—it gives the pantry room to absorb the next grocery shop.
Pantry habits that keep the system working
A pantry layout fails when returning an item requires too many decisions.
Keep maintenance simple:
· spend two minutes resetting packets before grocery day;
· put new duplicates behind the older suitable stock;
· wipe spills as they occur;
· check dates one shelf at a time every few weeks;
· keep a small “use first” basket or area;
· update labels when a category changes; and
· do not let back stock spread beyond its assigned space.
If a category regularly overflows, the answer may be buying less—not buying a bigger bin.
Once the pantry is under control, another awkward storage zone can be improved with our guide to organizing under the kitchen sink around pipes.
Mistakes that make a small pantry feel smaller
Decanting everything
Decanting can improve visibility for frequently used staples, but it creates work and may separate food from essential information. Keep original details or transfer them accurately.
Buying large sets
Sets often include sizes that do not match your shelves or shopping habits. A consistent look is not a good trade if half the containers are empty or awkward.
Filling every vertical gap
Extra tiers are useful only when both levels remain visible and reachable. A shelf riser that forces you to unload the front defeats the purpose.
Using oversized categories
A single “food” or “snacks” bin quickly becomes another junk drawer. Make categories specific enough to guide where items return.
Ignoring the door opening
Always measure the narrowest access point. An organizer may fit inside the pantry but still be impossible to remove when loaded.
The final verdict
The best small pantry organization system is not the one with the most containers. It is the one that keeps normal groceries visible and makes returning them almost automatic.
Begin with zones and shelf placement. Use what you already own to test the layout. Add a narrow bin for loose packets, a turntable for a difficult bottle corner or a tiered shelf for hidden cans only after the problem is clear.
For households that store many cans on a solid shelf, the YouCopia ShelfSteps is the most defensible targeted product in this guide. For everyone else, the best first purchase may be no purchase at all.
Once your pantry is easier to use, solve another common kitchen frustration with our guide to stopping food from sticking to stainless steel pans
Frequently asked questions
What is the best way to organize a very small pantry?
Remove unused food, create a few zones based on your routine, keep everyday items at an easy height and store duplicates behind the item already in use. Add organizers only where food remains hidden or unstable.
Should I put everything in containers?
No. Containers help loose packets and frequently used dry goods, but decanting everything costs money, consumes space and can separate food from dates, allergens and instructions. Use containers selectively.
How do I organize a pantry with deep shelves?
Avoid uncontrolled rows. Keep the open or current item in front and its duplicate behind, or use one pull-out bin for a single category. A turntable or tiered shelf can help when it keeps every item visible.
What should go on the bottom pantry shelf?
Use lower shelves for heavier, stable items such as bulk staples or drinks, provided the shelf can safely support them. Avoid loose glass bottles where they could be knocked over, and keep food off the floor.
How can I organize a small pantry without spending money?
Rearrange shelf heights, group food into simple zones, use existing boxes or trays, place older suitable stock in front and stop buying duplicates until the current supply is used.


Comments